Polishing Restorations: A Simple Chairside Finishing Workflow
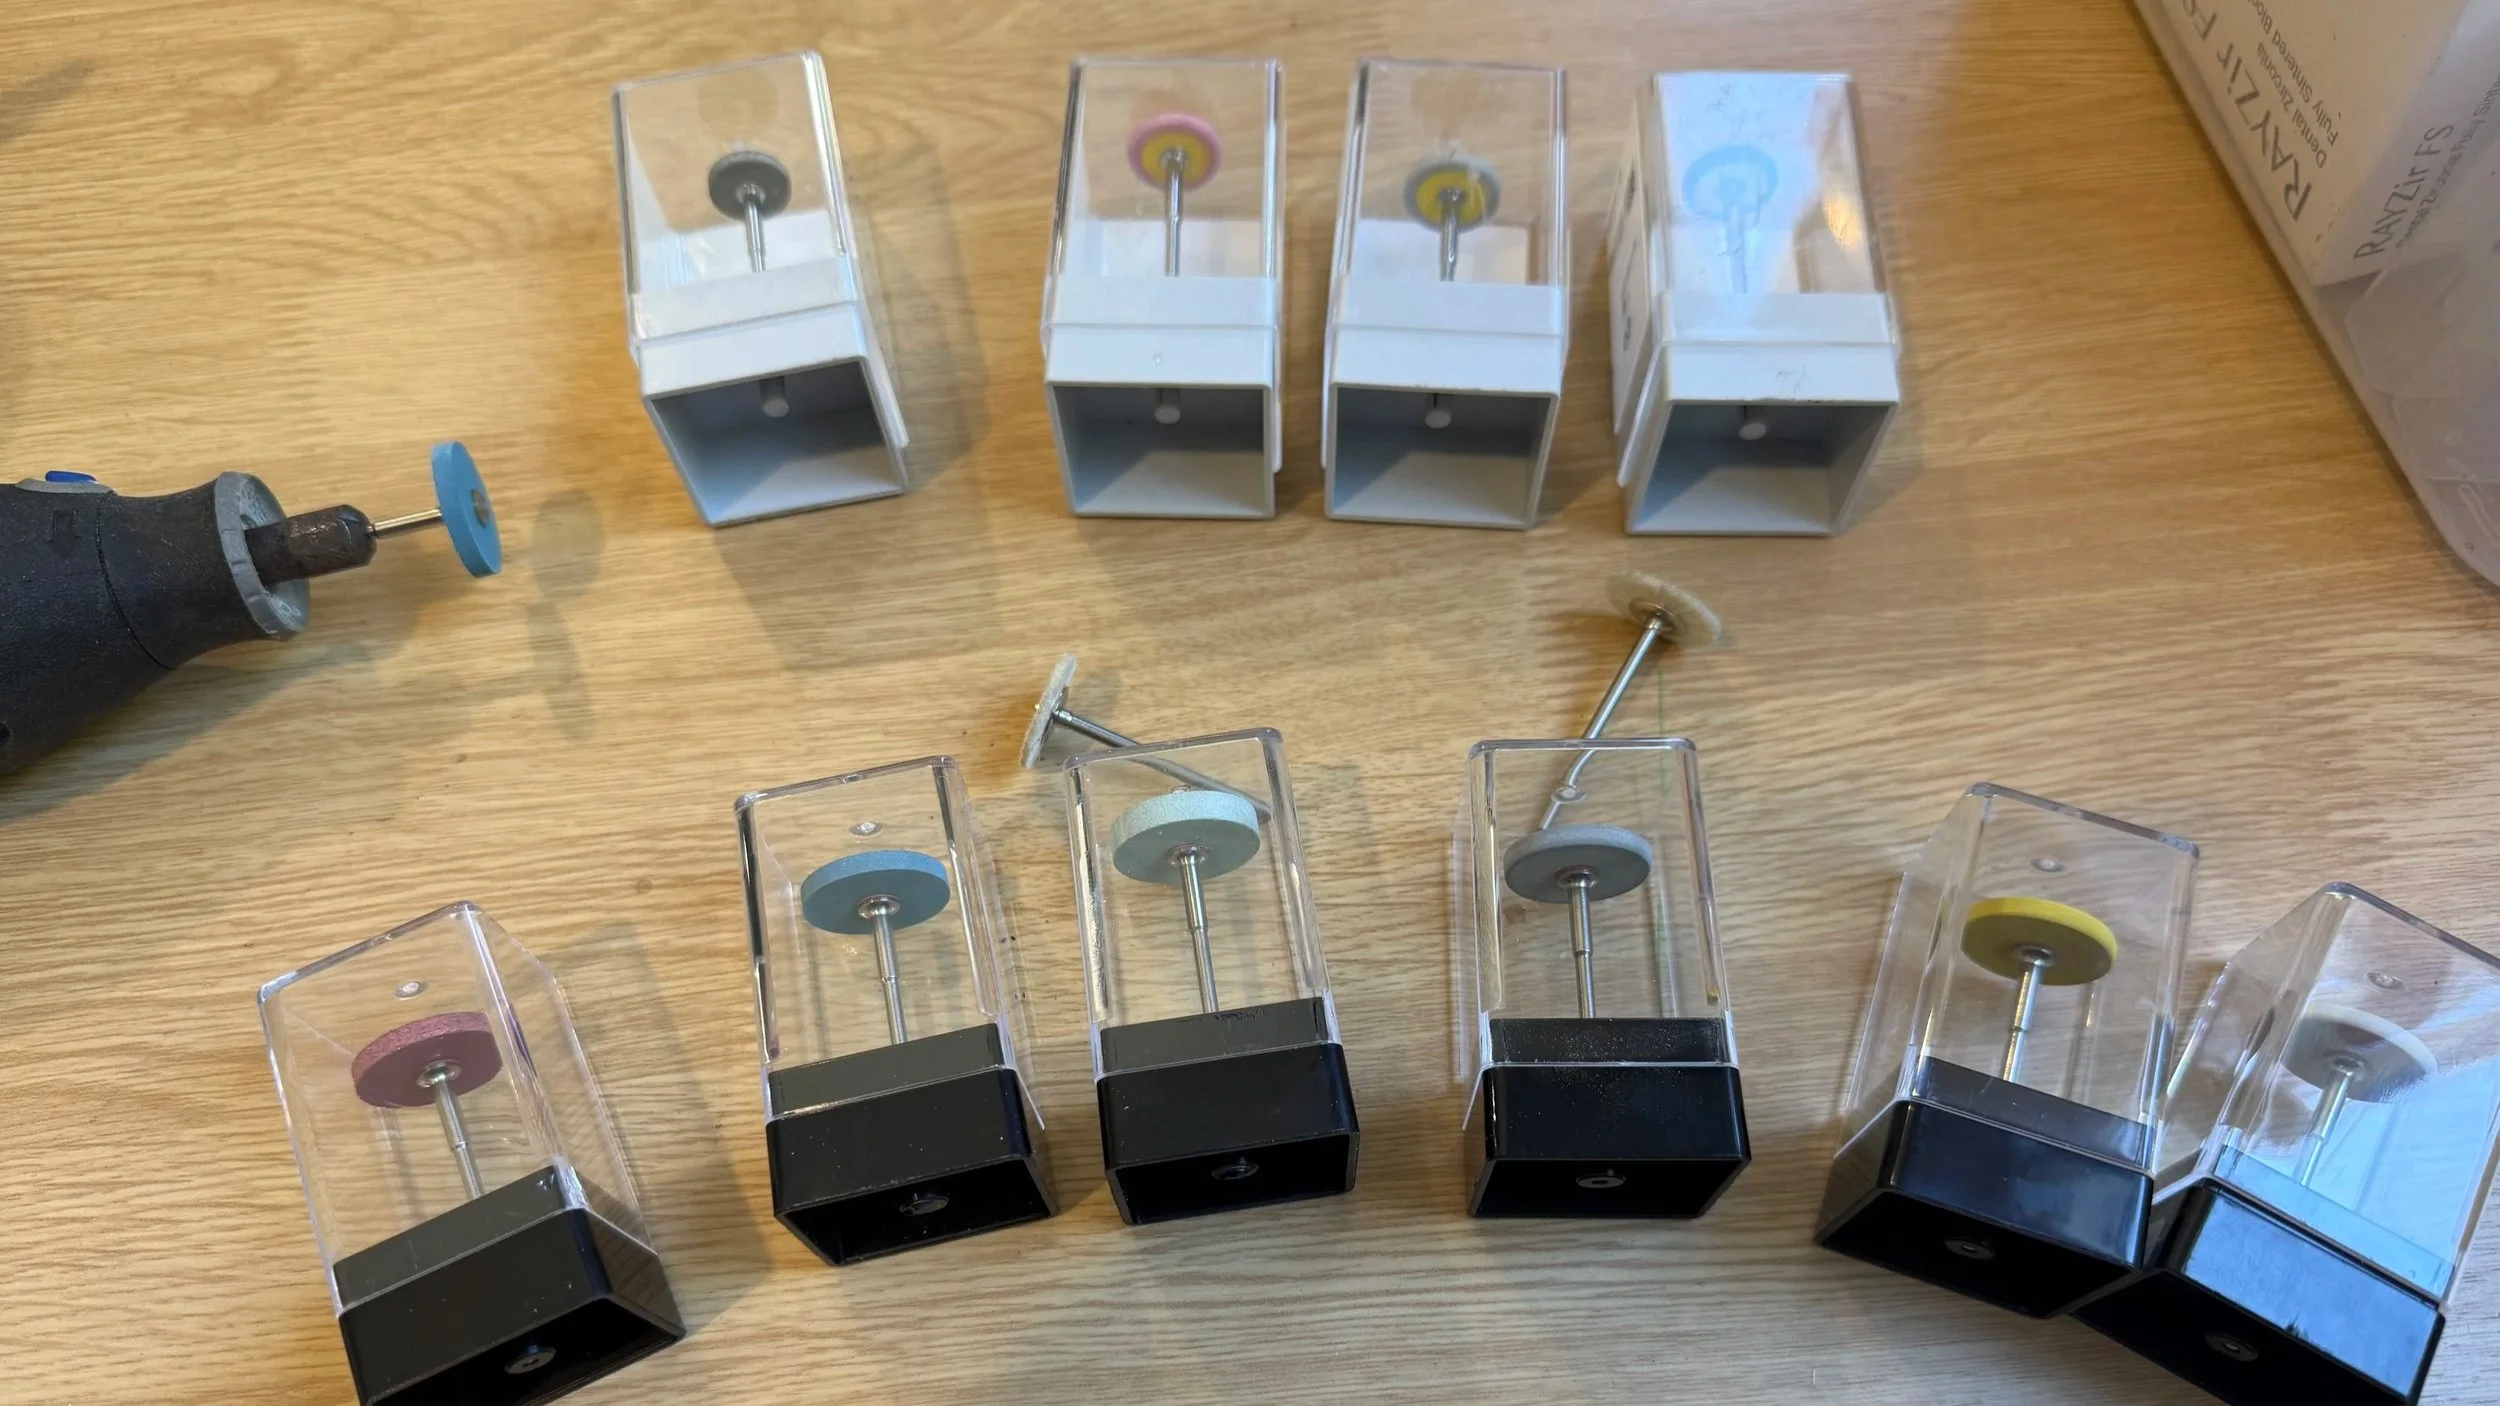
A range of polishers and Dremmel for demo purposes.
By Matt @ 5x Dental – practical CAD/CAM insights
Polishing restorations chairside doesn’t need to be complicated. With the right materials and tools, it can be a fast, predictable, and cost-effective way to deliver high-quality outcomes for your patients.
Once you’ve milled a crown, inlay, or onlay, you have a number of finishing options available, depending on the material you’ve selected.
Broadly, there are two primary approaches:
Stain and glaze, using a furnace and stain/glaze kits – generally what you’d expect from a traditional lab-finished crown.
Polishing, using a handpiece and a range of polishing wheels.
(A third for Hybrid materials composite-based stains fixed via a UV lamp, much like nail salon UV solutions, but for the purposes of this article, we will leave this option for another day)
Both approaches have their merits. In this article, I want to focus on polishing restorations chairside, as it’s the obvious first choice when integrating a milling solution. It helps reduce time, cost, and overall workflow complexity.
Yes, it does mean you’re initially excluding materials like e.max from your first install. That said, GC LiSi is a near match for many clinical scenarios, meeting a large part of those needs, and being a pre-fired disilicate makes it very well suited to polishing workflows.
And when we think about natural enamel and dentine, I can’t remember my own teeth ever going through a firing process with glaze applied during their creation. They grew, functioned, and were naturally polished over time.
Tools and considerations for polishing chairside restorations
Chairside polishing tools, CAD/CAM finishing tools
So what do we actually need?
At its simplest:
A lab-based handpiece
A straight handpiece
Or even a Dremel (yes, it will work)
If you do go down the Dremel route, just be mindful of the standard chuck size. You may need an additional kit to accommodate the shank of the polishers.
Polishers themselves are readily available in a wide range of shapes and grits. It really is just a matter of working from coarse → fine → extra fine.
There are plenty of manufacturers in this space, from well-established German companies to newer entrants.
I revisited all of this recently while using polishing as my go-to method during demos, with a view to progressing into stain and glaze later. I started out with a very well-known, widely used polishing system… and almost had to remortgage the house to acquire it. The cost alone made me pretty conservative about burning through them during demos.
Out of necessity (and curiosity), I went looking for alternatives and found options at a fraction of the cost, with outcomes that appear just as good.
Polisher shapes, technique, and practical chairside tips
Dental polishing technique, polishing CAD/CAM restorations
I’ve found that a football-shaped polisher is excellent for getting into tight fissure spaces. For general surfaces – proximals, cusps, and broader anatomy – a flat disc works extremely well.
A few things worth keeping in mind:
Always work with the disc spinning towards the margin. If it catches, you’ll be scrambling under the dental chair trying to find the restoration after it’s been launched from your fingers.
Speaking of fingers – try not to brace polishers directly against them. You may experience mild heat buildup or irritation.
Results and clinical application
I’ve included photos of some of the polishers I’ve used and others I plan to use moving forward.
Image: Selection of chairside polishing wheels and shapes currently in use and planned for future workflows.
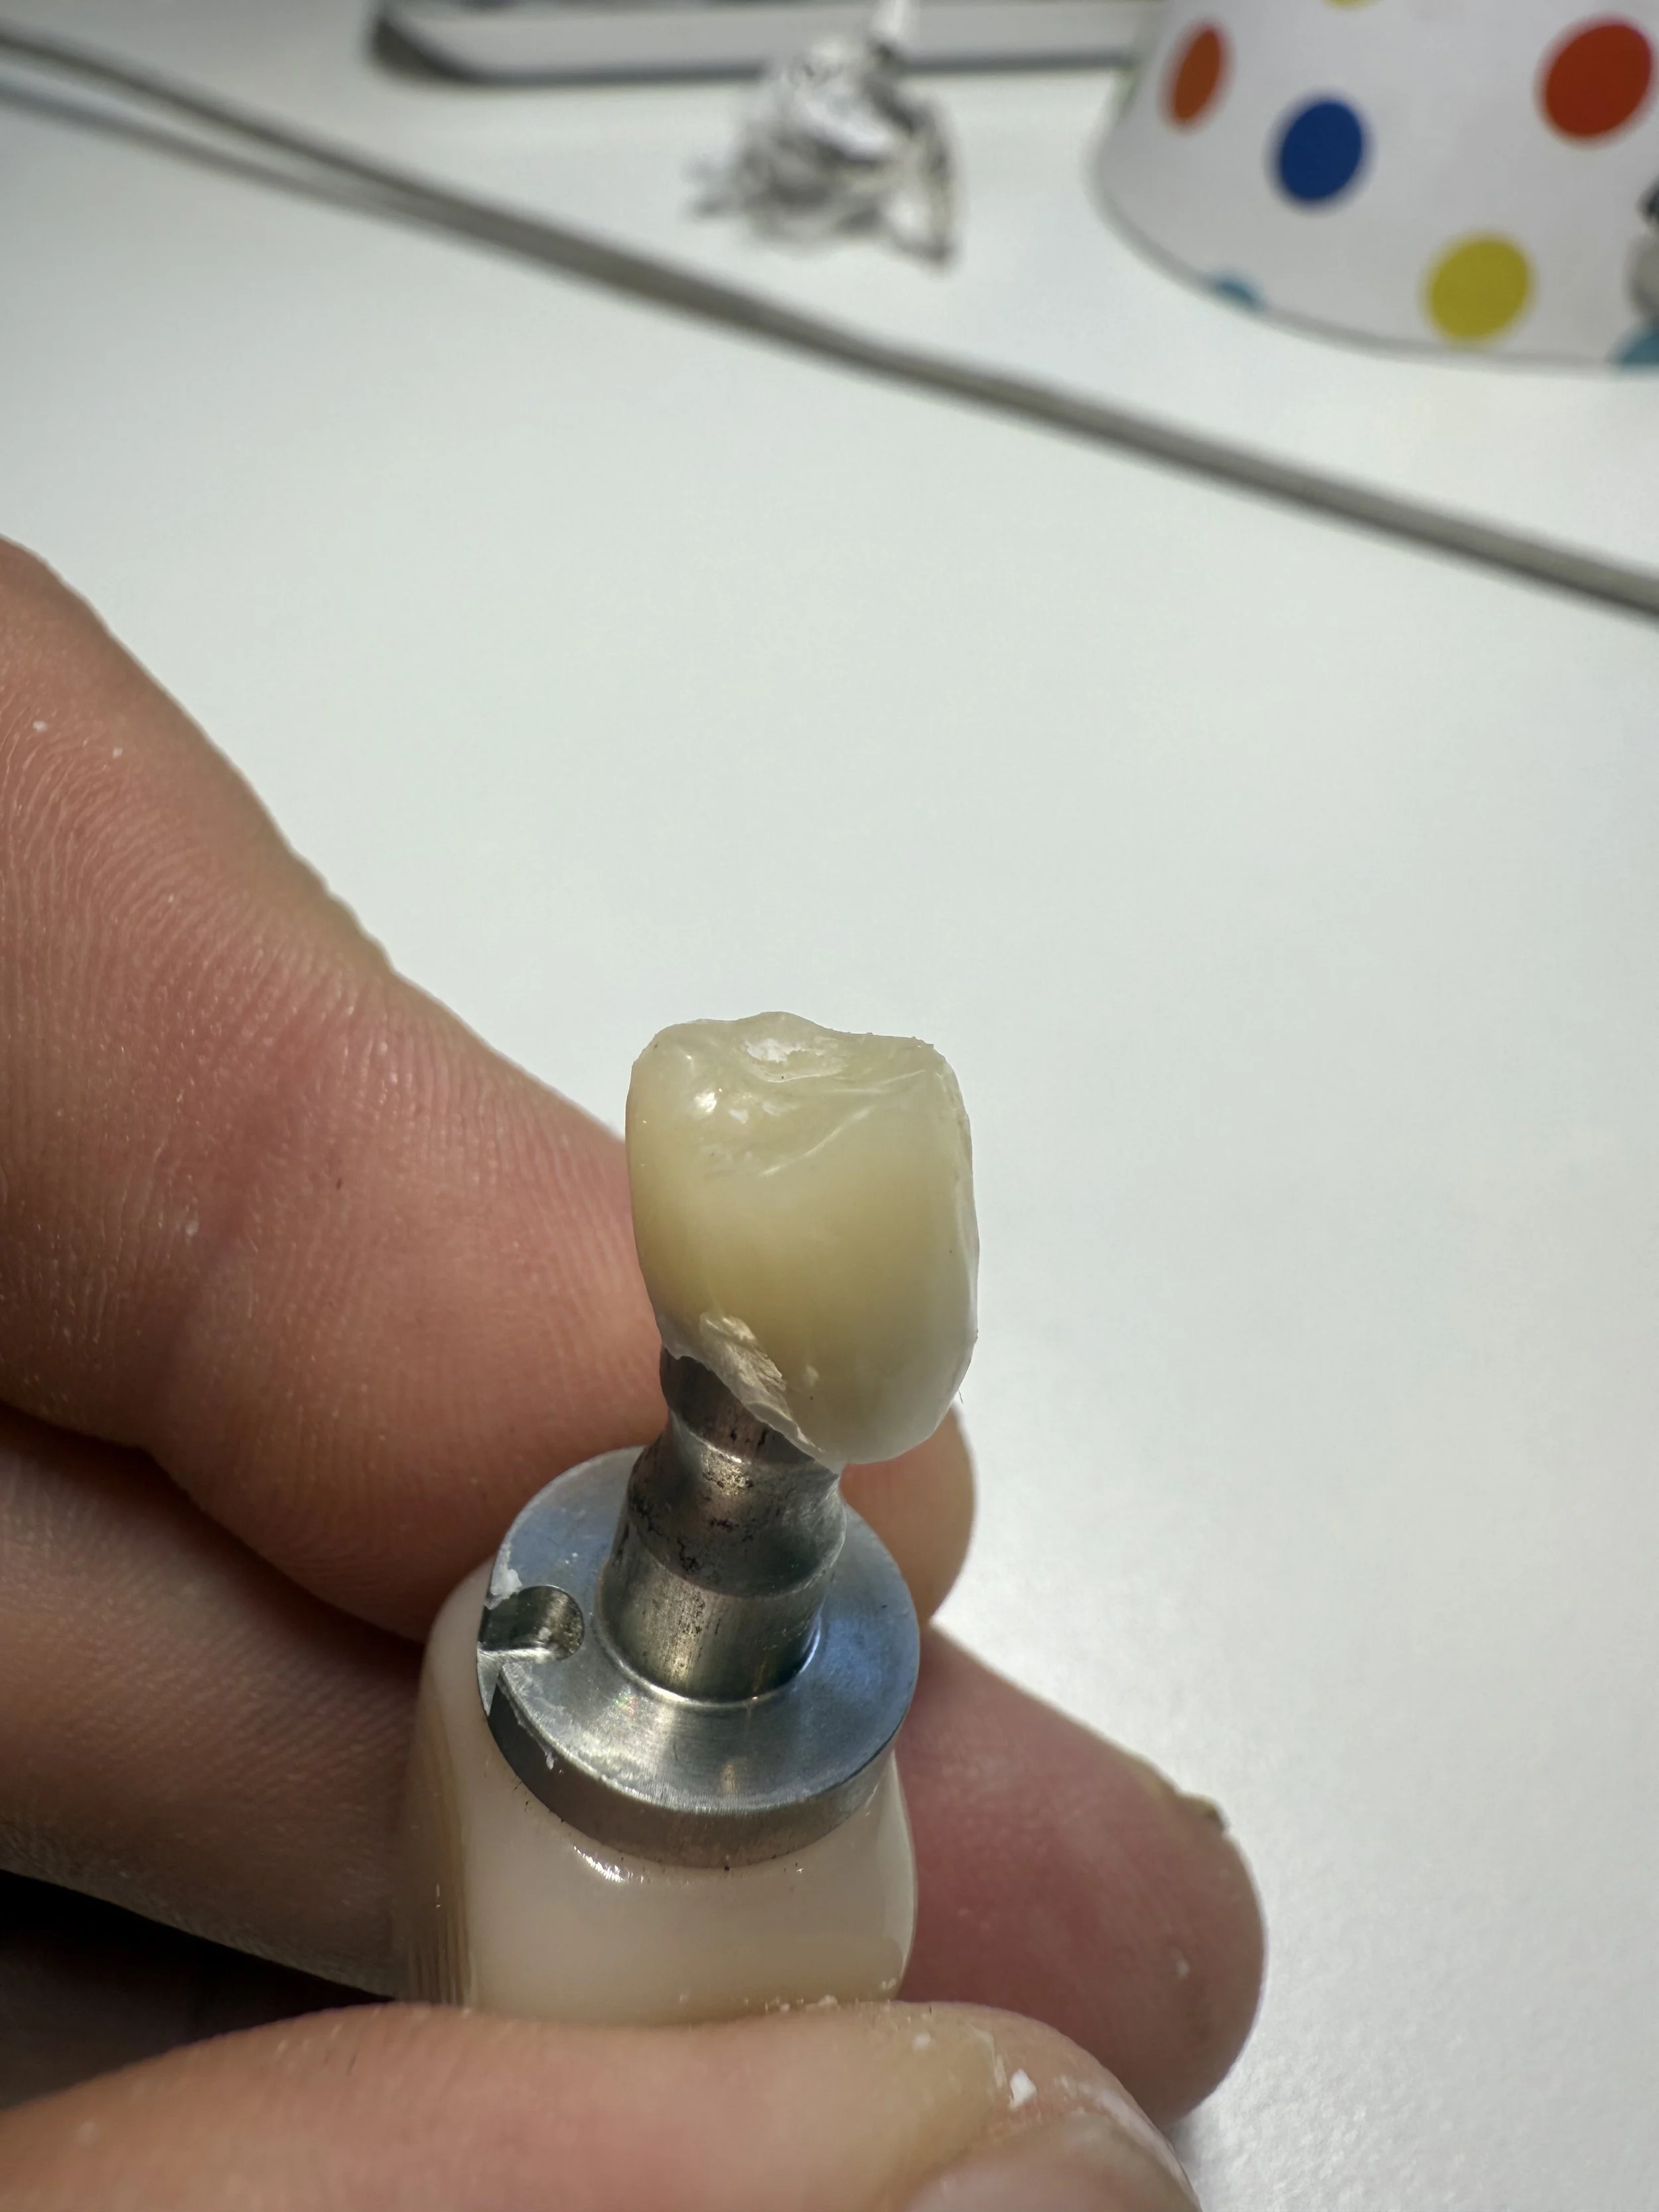
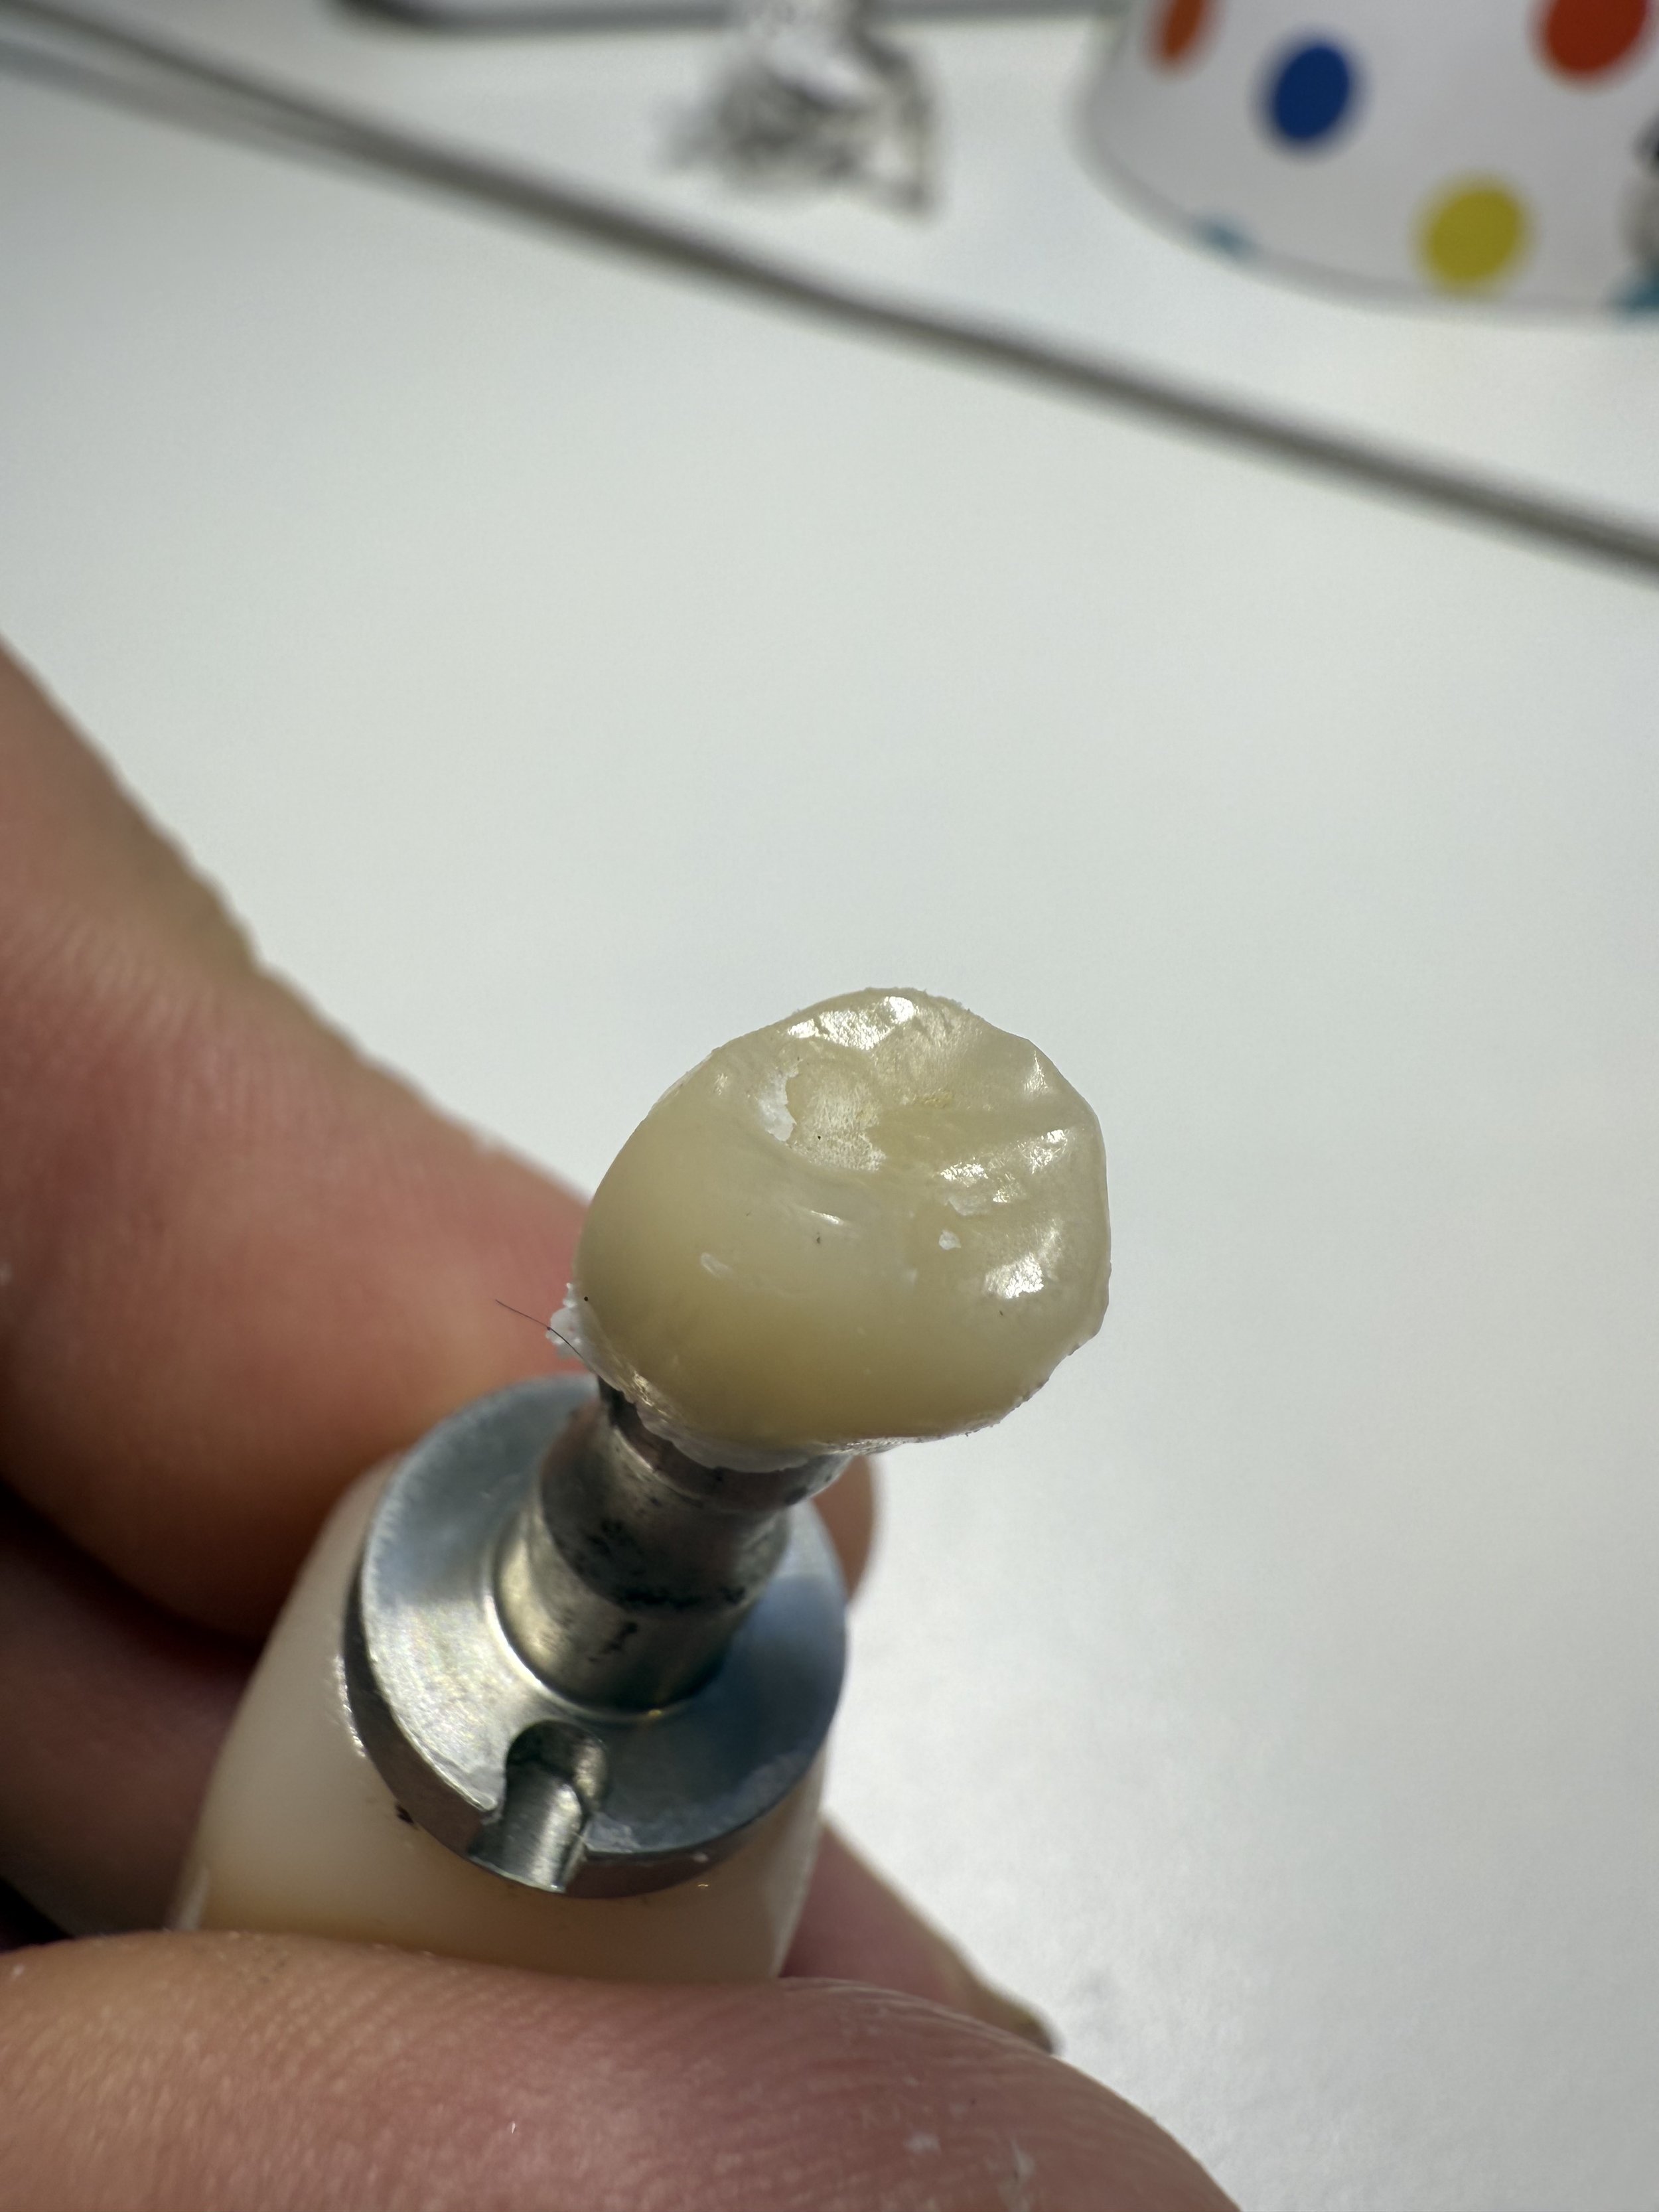
Outcomes are material-dependent, but most restorations achieve an excellent, high shine, which is further enhanced when wet.
Polishing is particularly well-suited to posterior restorations, especially when working with multilayer blocks. Many patients simply aren’t interested in stained teeth.
That said, polishing can also be an excellent solution for anterior cases, in the right scenarios.
Current setup and next steps
I’ve also included images of my current setup.
Image: Chairside polishing setup showing handpiece, polishers, and workflow positioning. Over time, I’ll be adding polishing paste and additional football-shaped polishers as I continue to refine the workflow.
As with most things chairside, polishing is simple, efficient, and highly effective when done thoughtfully – and it fits naturally into a streamlined CAD/CAM workflow.

About 5x Dental
At 5x Dental, we focus on practical, real-world chairside CAD/CAM solutions that reduce complexity without compromising clinical outcomes. From milling and design workflows through to finishing and polishing, our goal is to help clinics integrate technology with confidence.
If you’re exploring chairside milling or refining your existing workflow, we’re always happy to share what’s working in the real world.
Chairside CAD Restorative Software: Past, Present, and What’s Coming Next
At 5x Dental, we spend our time right where technology meets real-world dentistry. Our role isn’t to push a single workflow or brand, but to help practices navigate an increasingly crowded digital landscape—encompassing scanners, software, milling units, and everything in between. This blog is drawn directly from what we see, test, and implement in practice every week.
In the beginning, there was really just one. With a 40-year legacy behind it, it’s easy to understand why CEREC still commands such strong interest among dentists when discussing chairside restorative solutions. Back in the early 2000s, the first truly 3D-capable versions of CEREC software appeared, and from there we’ve seen a steady stream of incremental improvements into what the platform is today.
What’s often forgotten is that, in the background, many other manufacturers were watching closely—learning, testing, and quietly refining their own approaches.
Over the past five years, the dental industry has seen widespread adoption of intraoral scanners. Much of this growth was initially driven by scan-and-send workflows, with labs at the centre of the process. The pitch was simple: easier impressions, fewer consumables, faster file transfer, and a clear digital story to present to patients. For most practices, that was more than enough reason to take the leap as prices and ease of use improved.
But not far behind that movement has always been chairside CAD software. For many manufacturers, this has been the natural next step—supporting dentists who buy a scanner today and gradually move toward in-house restorative workflows. It’s been there all along, quietly waiting in the wings.
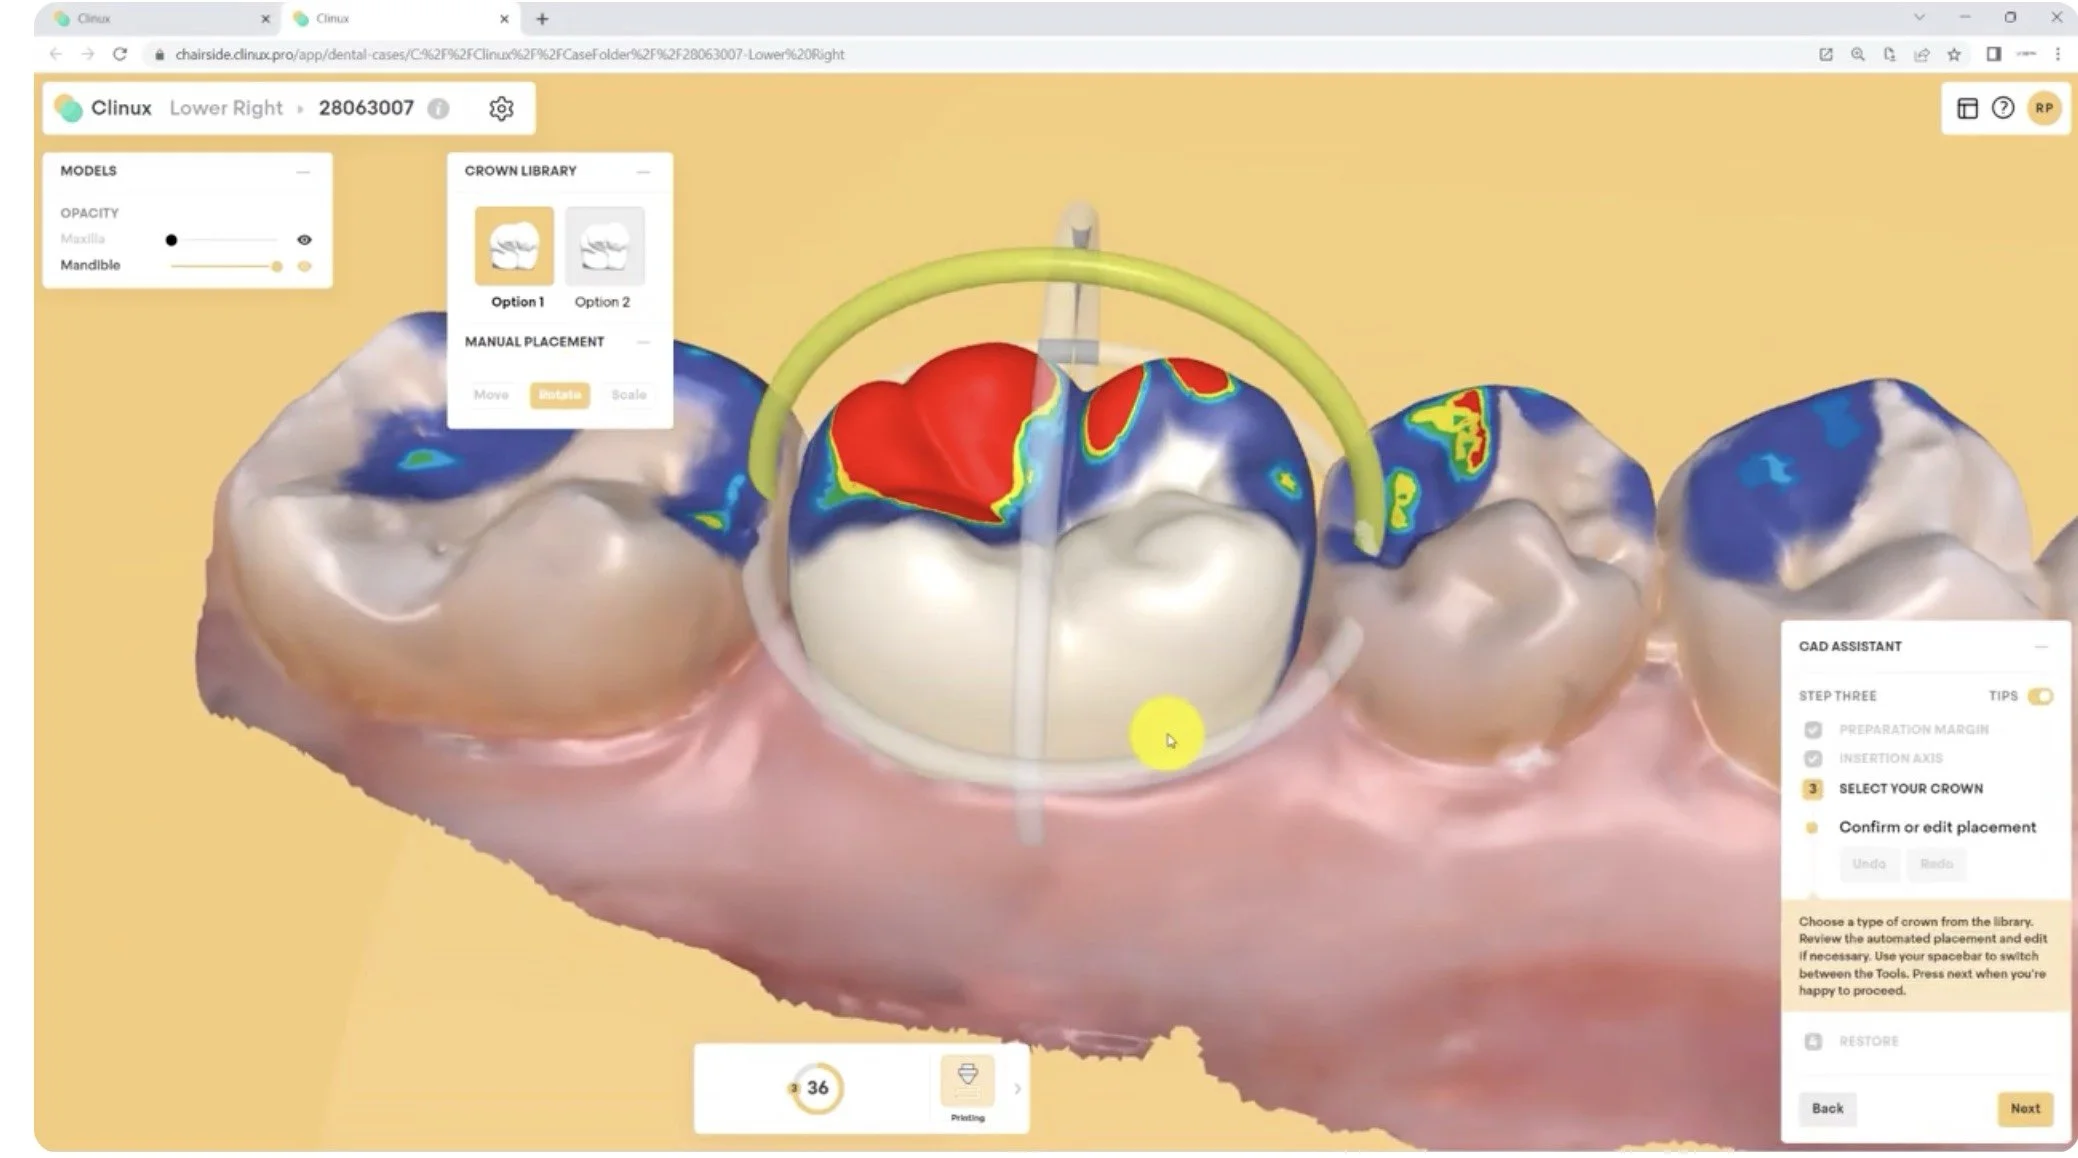
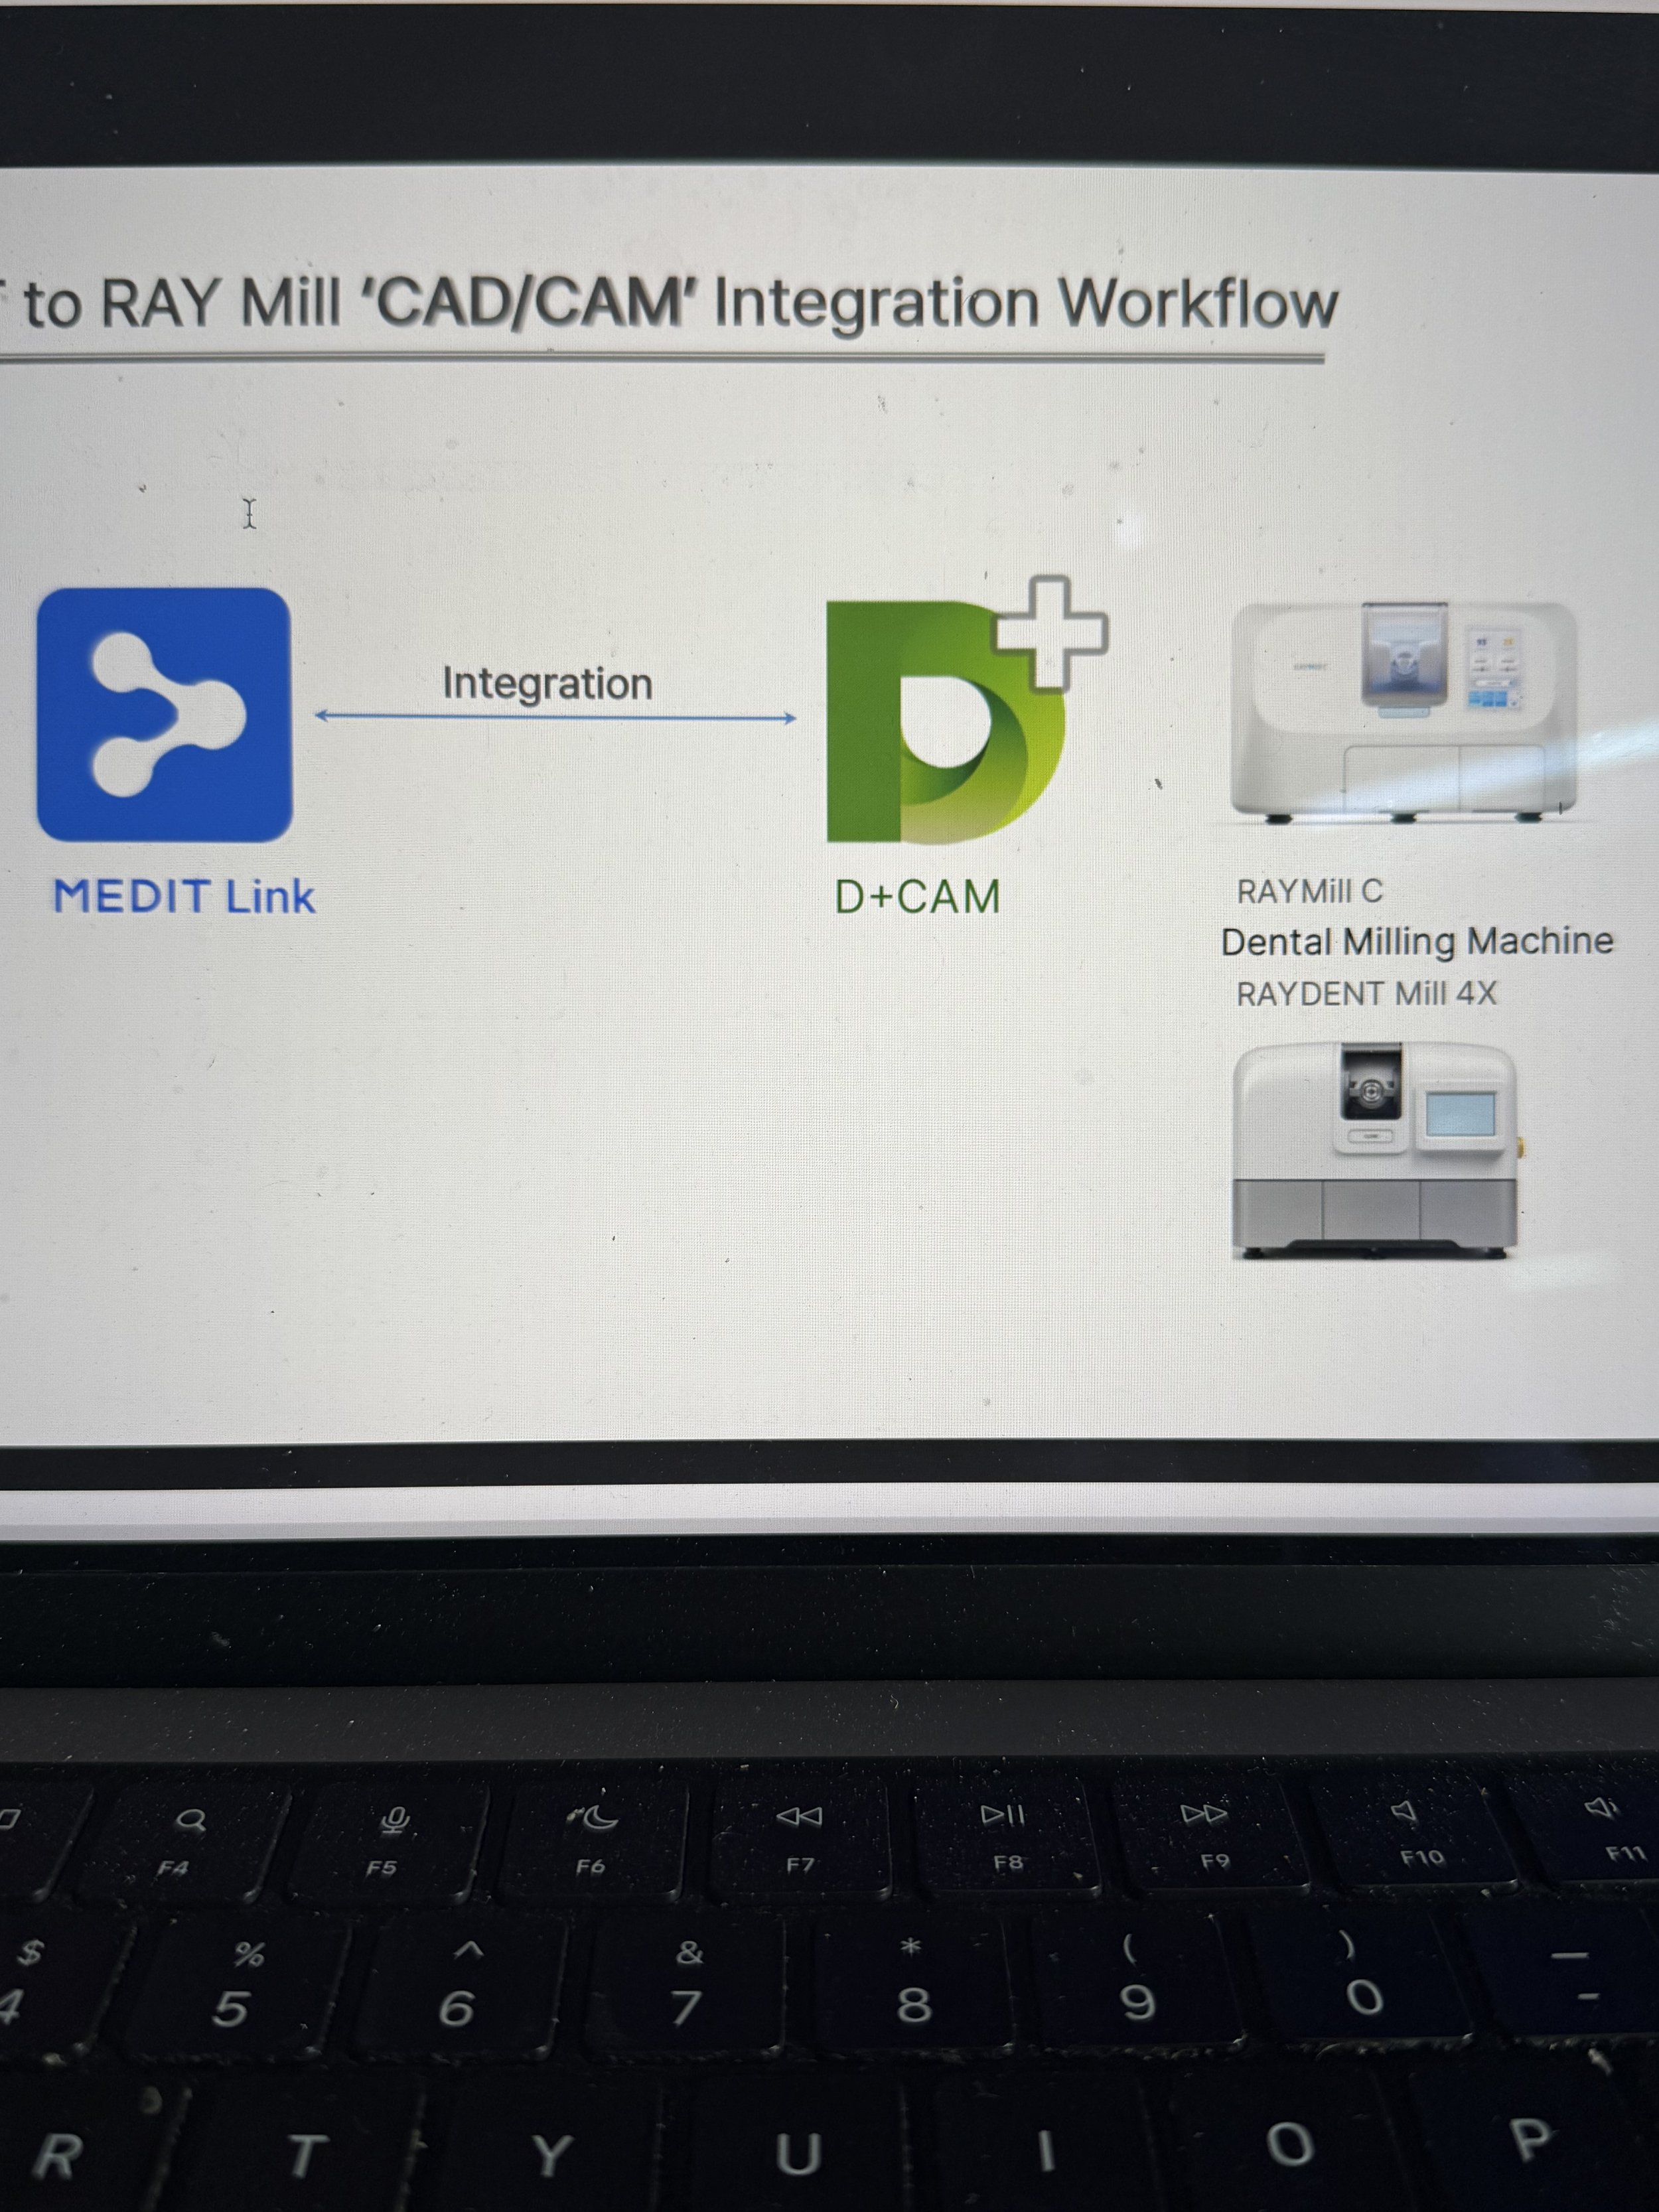
That’s exactly how I first came across Raymill C. While scrolling LinkedIn and thinking about my next move in dentistry, I stumbled across an article discussing the integration of D+CAM software within the Medit dashboard, designed to interface with Medit CLINICAD (beta). At the time, I didn’t own—or have much access to—Medit scanners, so I filed it away mentally and moved on. It actually took me another six months to circle back to it.
Now that I do have access to Medit, I can say this with confidence: that solution on its own is frighteningly powerful, genuinely compelling, and very good.
Looking further afield, Clinux stands out as an independent, cloud-based CAD platform. It has a familiar CEREC-like feel, and once you get under the hood, the reason becomes clear—several of the key contributors come from senior CEREC backgrounds. Clinux integrates neatly with most scanners using a folder-based workflow rather than individual file imports, offers meaningful CAM integration, and has a pricing model that works equally well for single-tooth cases and higher-volume environments.
Then there are the AI-driven cloud providers, such as Dentbird from Korea. From the outset, you can see enormous potential, particularly in chairside workflows, with clean CAD-to-CAM integration, self-selecting prep, margin marking and path of exertion. Their current focus leans more toward large lab environments and junior technician workflows, but even in a suburban practice, it’s easy to see how this type of solution could slot into everyday use. Pricing currently places it outside of reach for many clinics, but strategies evolve, and this space is moving quickly.
I’ve also spent time speaking with clinicians who use 3Shape Dental System, as once again, Ray D+ CAM has a clean integration, and the feedback is consistently enthusiastic—particularly around AI-assisted design. While I haven’t personally spent enough time hands-on to draw firm conclusions, knowing the scale, depth, and track record of 3Shape, combined with the passion of the dentists using it, it’s clearly a serious contender in the chairside CAD space. Exocad also has a nice offering with a RayD+ CAM Integration with a Key Dentist in Korea using 6 Raymill Cs for large anterior same-day cases.
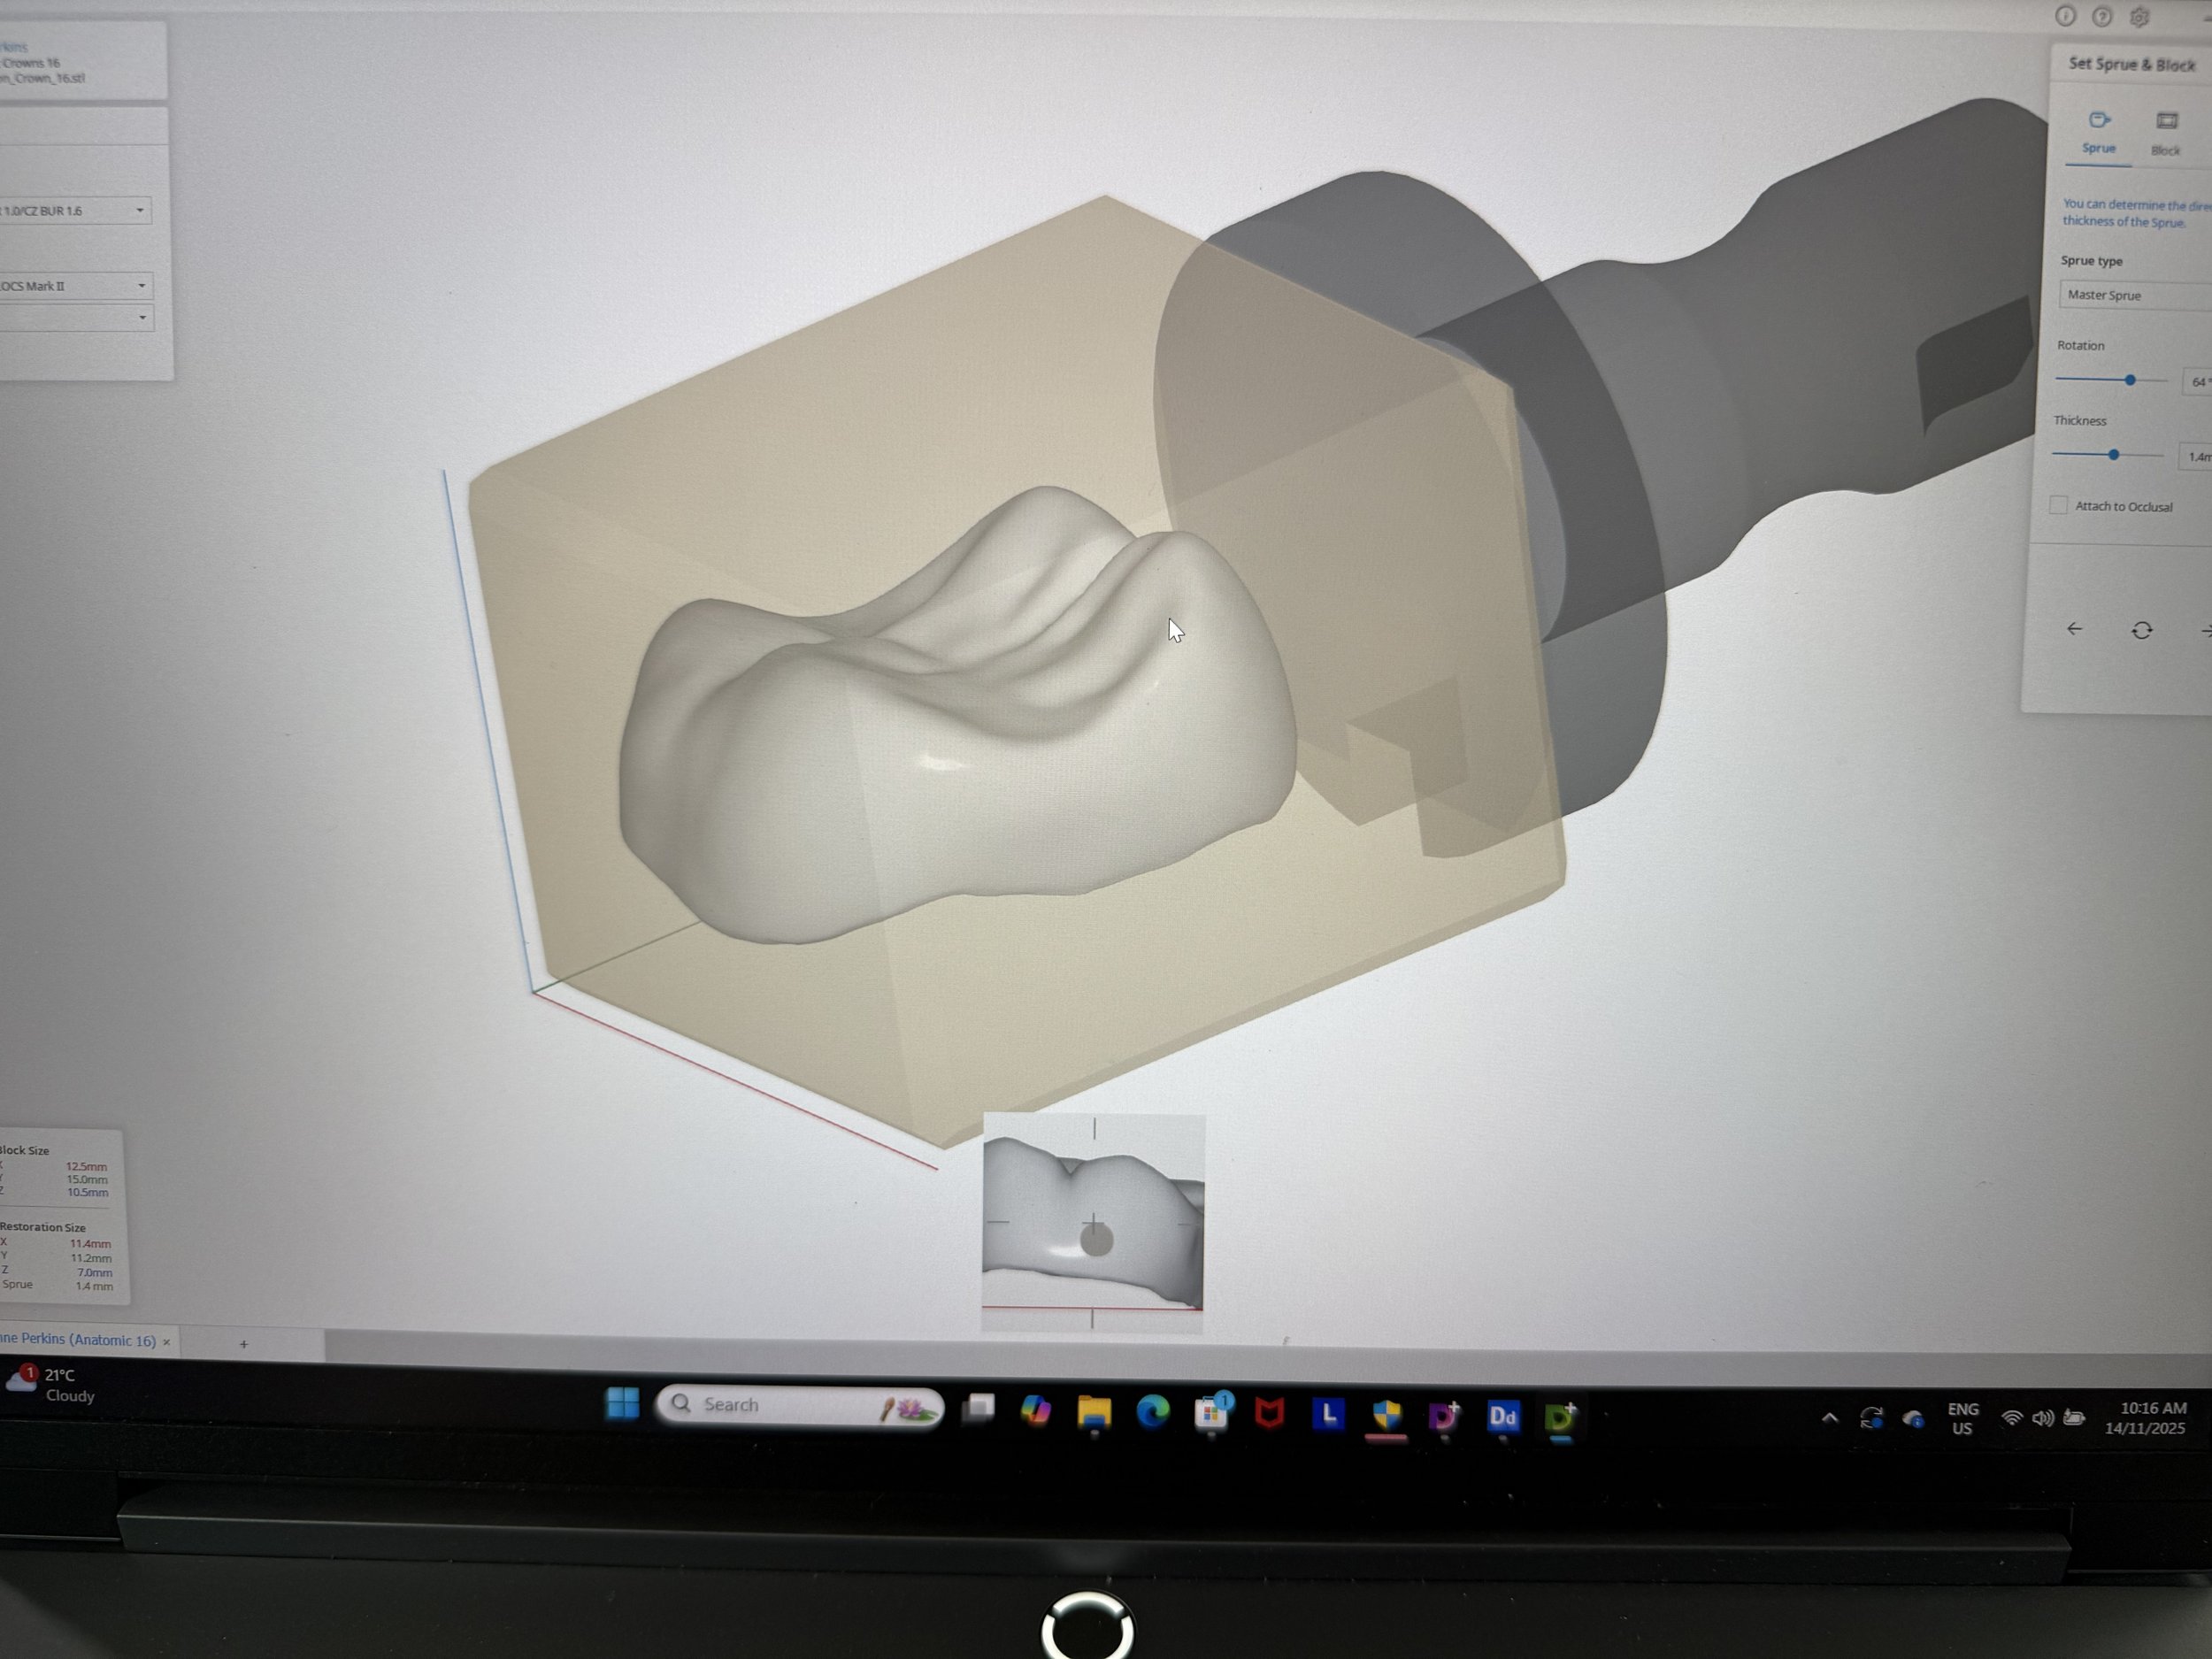
Ray, meanwhile, takes a slightly different approach by offering its chairside CAD software free of charge with the purchase of the mill. It integrates seamlessly with their CAM software and RAYiOS 2, creating a true single-manufacturer workflow. From a quality, ease-of-use, and price perspective, it’s an extremely compelling option—especially when you consider the ongoing software development and a milling unit that’s designed, built, and supported in-house, with longevity clearly in mind.
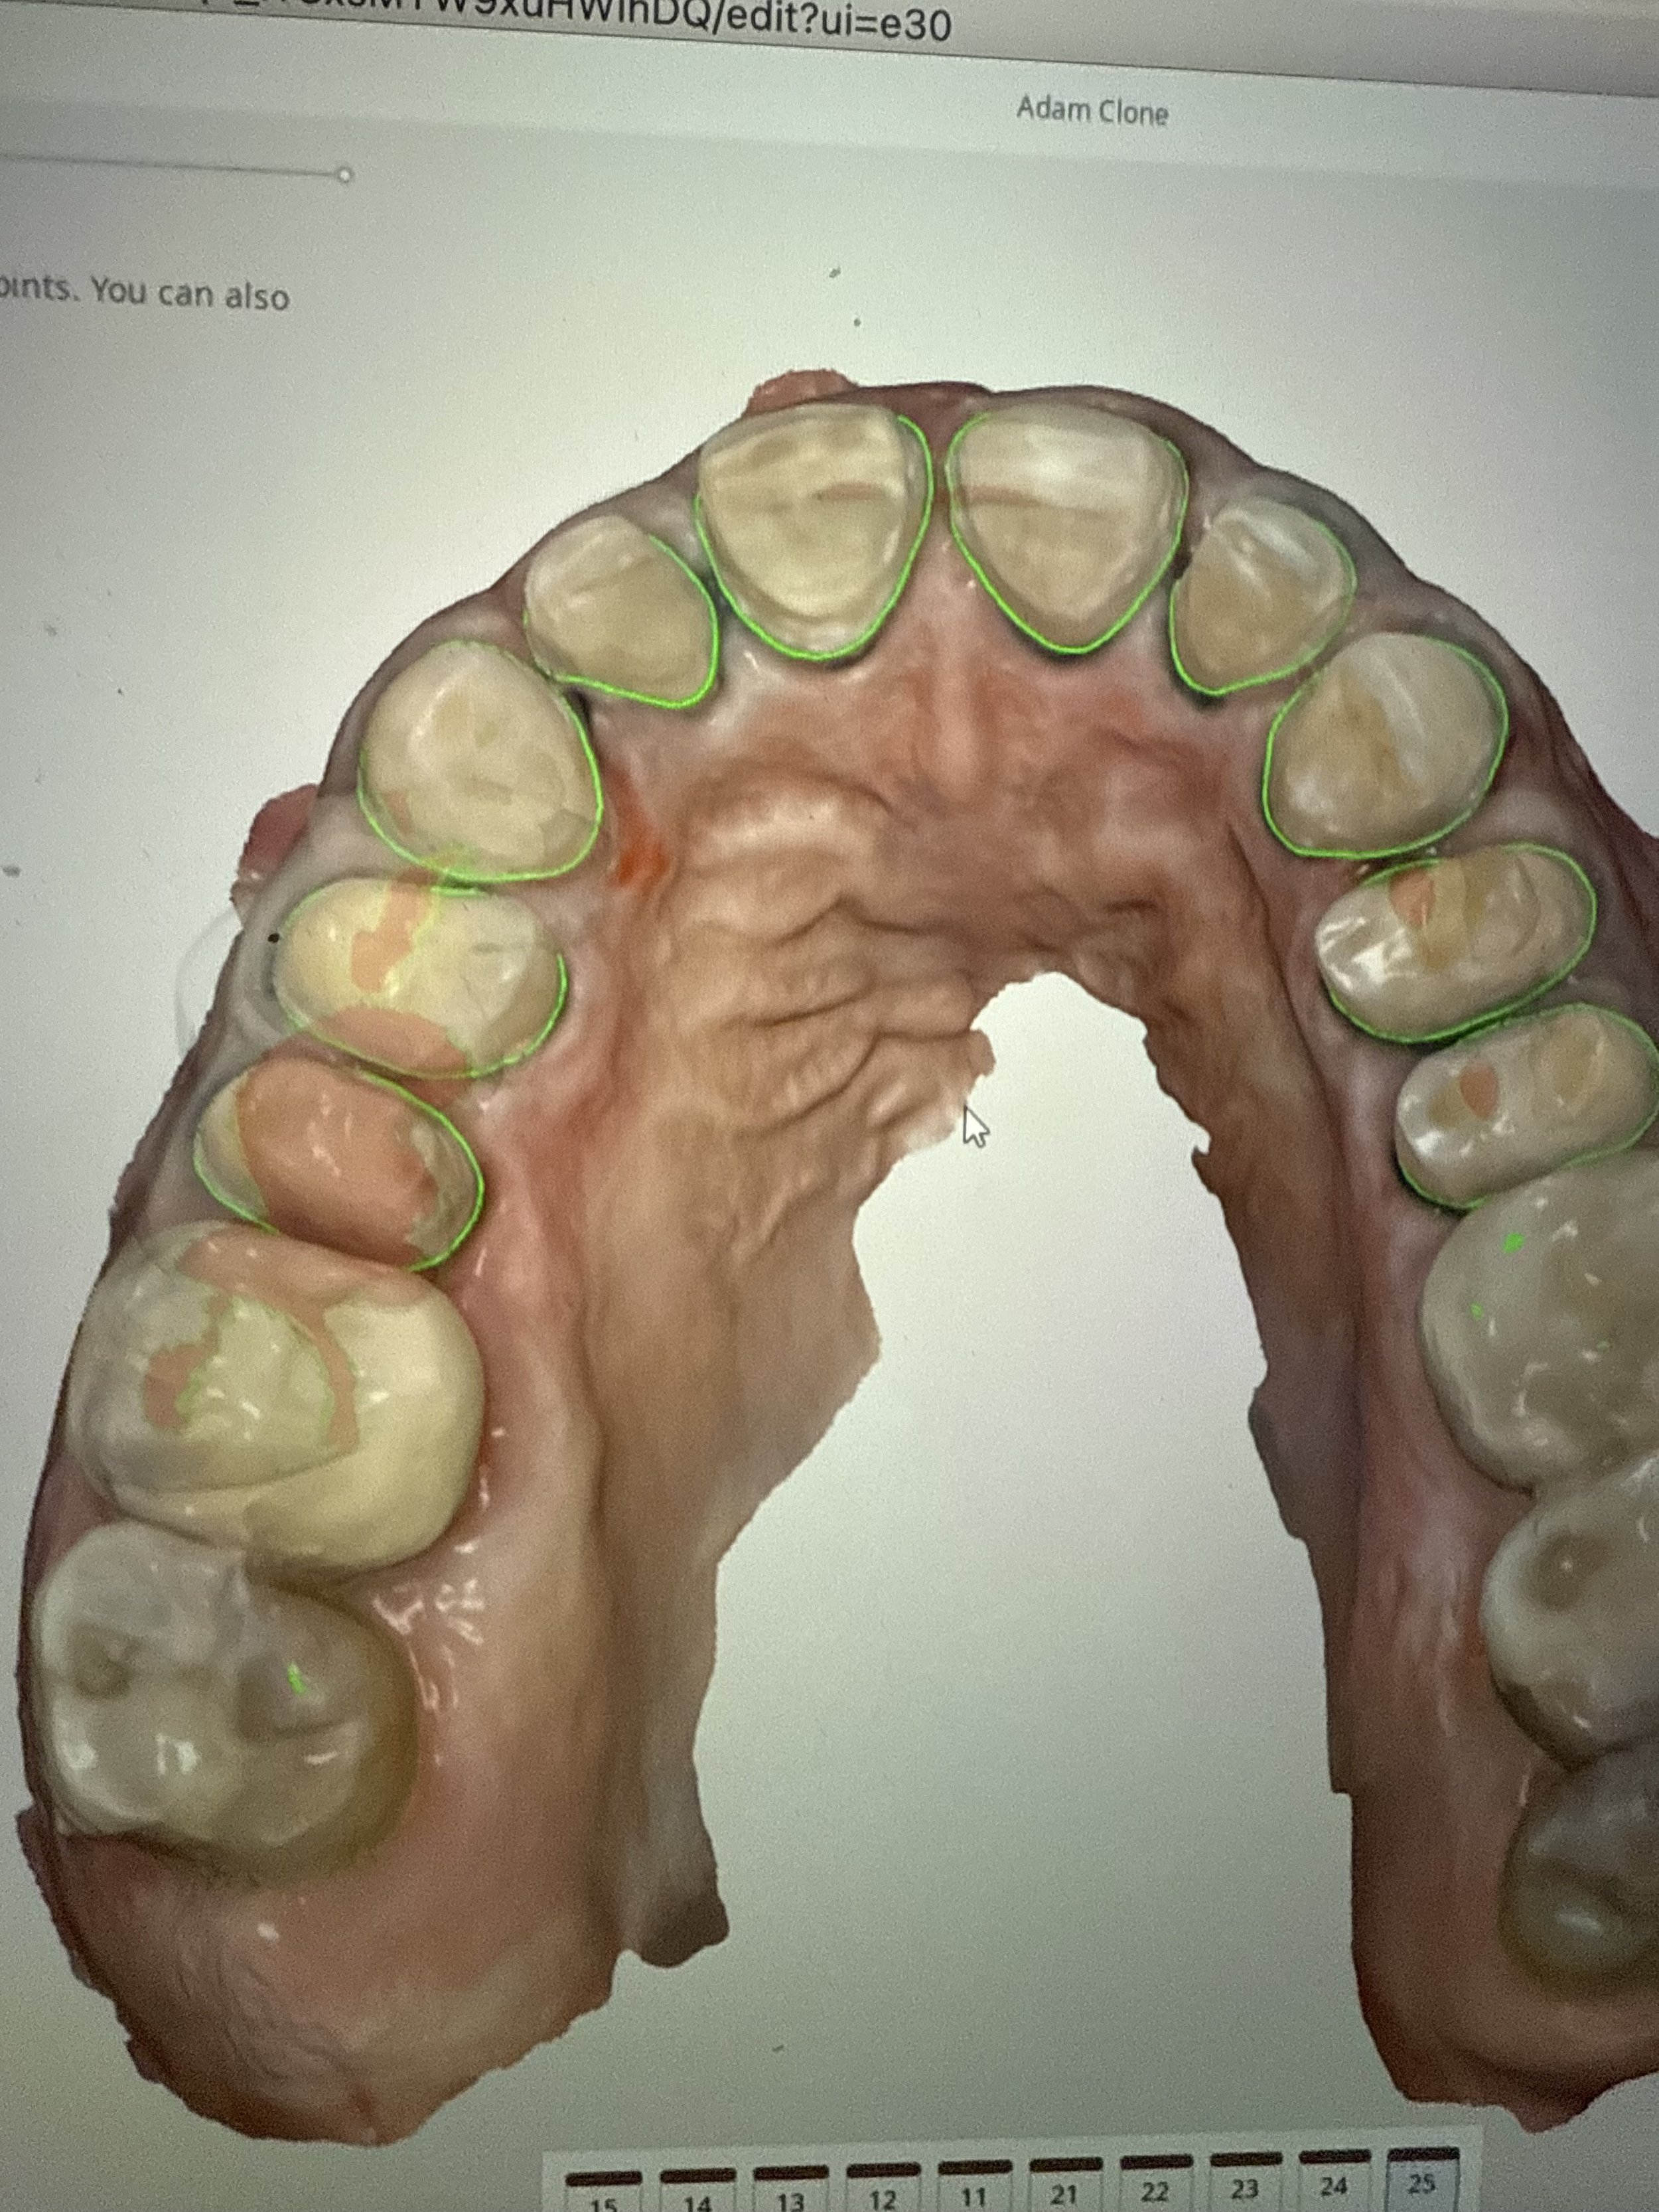
Recently, I completed a full Medit install and decided to push things further as a real-world test. We took a full 5-to-5 anterior case that one of the practice’s associates had previously scanned and sent to a lab, and ran it entirely through the chairside software. What stood out was how well the system handled the complexity—AI tooth identification, margin marking, and pre-op copy functionality all performed smoothly. This was very much a “keep pressing buttons until something breaks” exercise, and within less than an hour, we had it running beautifully, with plenty of smiles around the room.
Yes, the past has undeniably been driven by CEREC. But the future, in our view, will belong to whoever controls the strongest intraoral scanner install base and understands manufacturer bias. For the average suburban practice, we’re going to see a real shift over the next few years toward accessible, reliable chairside milling in every surgery—not just for simple posterior restorations, but increasingly for larger, more complex, highly aesthetic anterior cases planned and delivered in-house.

At 5x Dental, this is exactly where we focus our energy—helping practices evaluate, implement, and support chairside CAD/CAM solutions that actually work in day-to-day clinical environments. Whether you’re just starting with digital impressions or looking to bring more restorative workflows in-house, our role is to guide you through the options and help you choose what’s right for your practice, not just what’s trending.
If you’d like to explore chairside CAD/CAM further or see what may work for you, we’re always happy to continue the conversation.